Sunday 26 May 2013

Tips #4 My Most Valuable Resource

The most valuable, and most used, resource that I have is not one that is easy to duplicate quickly, but it is one that you can build up as you go and will, if your career in teeaching is a long one, prove very useful.

It's pictures. Not just any pictures but a large bag of credit card sized pictures that have all been laminated on both sides. They have been gathered from all kinds of sources. Some have been printed from the internet, others have been cut from TV guides and magazines. Many have been taken from shop catalogues where you can find all kinds of pictures of clothing, household items, toys, gardening equipment - thousands upon thousands of things.
I have pictures of all of these things, not to mention animals, landscapes, monsters, robots, aliens, flowers, abstract paintings, interactions (TV guides are good for these). Altogether I have several thousand that I have built up over the past ten years or so. 
You can start more modestly by always making a few for each lesson.
If you do not have access to a laminator you can still do it with sellotape. Simply print (or stick) the pictures onto a piece of A4 size paper.  Cover it top to bottom on both sides with wide strips of tape. (If you overlap by half the width of the tape it takes longer but gives a much more duarable result.) Trim the edges and cut it up into the small pictures you need.

I use these pictures in many different lessons. You can use them as prompts for charades (as in my last lesson plan), for drawing or describing activities, simply to show to students as vocabulary items or (as we will see in a later lesson plan) to get the students to write or tell detailed and complex stories. 

Whenever you need student prompts it's a good idea to take the extra time to make them this way and add to your pile of pictures. You will need to make them robust enough for the rough handling they will get in multiple classes anyway so you might as well build them to last and keep them forever.

Lesson Plan: Hobbies And Pastimes

Lesson Level: Junior 1 and 2 (Grades 7 and 8) Duration: 45 Minutes

Lesson Title: Hobies and Pastimes

Grammar and Vocabulary

Hobbies vocabulary
Giving reasons using because.
My favourite ___________ is __________because____.

Lesson Objectives

To develop vocabulary for hobbies and pastimes and grammar to discuss them

Materials Required

Cards with pictures of various hobbies and pastimes on them.1

Preparation

Place a stool on the teaching area for use in the charades game.

Procedure

1

Introduce lessonWrite three of your hobbies on the board.
Explain that these are some of your hobbies. Elicit questions about the hobbies from students. (eg. What do you read. When do you listen to music.) Write student questions on the board.
(5 Minutes)

2

Toss the sponge ball from student to student.
Each student must stand up and say
My favourite hobby is___________. I like it because_______.”
After statement ask student some of the questions from the board before passing the ball.
(5 Minutes)

3

Demonstrate charades by choosing a hobby and acting it out. Students must guess what it is.
(2 Minutes)

4

Play charades.
In each turn a student must come to the front and look at one of the picture cards.
The student acts out the hobby on the cards without speaking. Student may use the stool as a prop or any other item they wish from the classroom.
Other students raise their hands to guess. Choose students from raised hands.
When a student guesses the hobby correctly he or she takes the place of the student at the front and acts out another hobby.
(15 to 20 Minutes)

5

Put class into groups of four.
Put these questions on the board.

1. What is your favourite hobby?
2. When do you do it?
3.Where do you do it.

For stronger groups add questions

4. Why do you like it?
5.Do you need anything special to do it?

Students survey own group and write answers for each group member.

(5 Minutes)

6

Elicit feedback from group asking students about each others hobbies.

(To end of lesson)

Notes

    1. The pictures can be taken from clip art from the internet or drawn. You may optionally include the word with the picture.

Saturday 25 May 2013

Tips #3 Art for Art's Sake

If you are a great artist, confident that you can whip up a masterpiece to rival Rembrandt in a few seconds with four colours of chalk, then you should ignore this. There's nothing here to interest you.
On the other hand if, like me, you are a fairly useless artists whose rabbits are indistinguishable from a bunch of bananas then I have a few suggestions.

You can nowadays, of course, find and print stuff from the internet. There are plenty of royalty free clip art sites around. It's a good solution but it fails to address two issues. First, you might, again like me, find yourself with a computer but no printer. That means drawing your own pictures to put on the board.
Second, and even worse, there might come a time when you need to draw something on the board, a time when your efforts to explain what something is using words have failed. A classroom of blank faces will be facing you and you know that if you could just draw, for example, a picture of a caravan they would all understand immediately.

I have two, well three really but two go together, pieces of advice.

Here is number 1. Think about what things you might need to draw in the lesson. Anticipating the need is half the battle. And here is number 1A. Practice. If you think you might need to draw a rhino on the board then search the internet for pictures of rhino, choose the simplest and draw it a couple of times on a piece of paper. Take the paper to class with you so that you can remember how it goes.

And here is, the far more important, number 2.
You don't need to be Rembrandt. You don't need to have detailed, anatomically-accurate representations of people. Stick figures will do just fine. 
You want a house? Draw the kind of house a kid draws - a box with smaller boxes for windows and door. A triangle for a roof, another box for a chimney and, for that added artistic flourish a bit of scribble for smoke.
You want a sheep? scribble down a roughly circular cloud, add a head, ears and four straight lines for legs. Presto! A sheep.

It doesn't need to be good it needs to be recognisable.
In fact the more rubbish you are at drawing, the more the kids will like it. Just put down something that is guessable. If a couple of kids seem to know what it is get them to stand up and tell the class in Chinese.

And that's it, all you need to know about art in class.

Oh yes, one more thing. If, as you will in some lessons, you have kids come to the board to draw anything, don't be embarrassed at your own poor efforts when one of them, in five seconds flat, sketches a detailed and scarily lifelike, life-size alligator.
Just compliment him graciously and don't ask him next time.

Lesson Plan: Apartment Block

Lesson Level: Junior 1 and 2 (Grades 7 and 8) Duration: 45 Minutes

Lesson Title: The Apartment Block

Grammar and Vocabulary

Present continuous
Vocabulary of various activities

Lesson Objectives

To understand and use the present continuous.

Materials Required

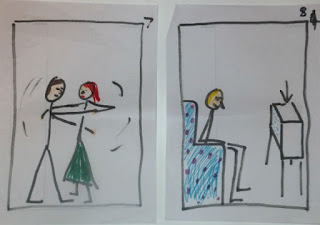
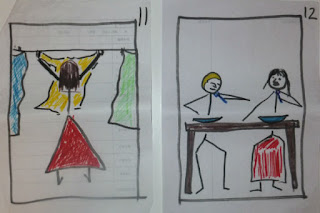
Drawings of 15 people/groups engaged in different activities plus a drawing of a front door.. Drawings should all be the same size big enough to fill the height of classroom board with four rows of four)
Drawings can be of stick figures as long as the activity is clear.1
Magnets or other method of attaching pictures to board.
Two sponge balls
Answer key. (A list of room numbers and what is happening in them.)

An easy, prepared short dialogue using present continuous forms.

e.g.
John: Hello Billy, what are you doing?
Billy: I'm reading a book.
John: Are you enjoying it?
Billy: Not really, we are reading it at school. This is like doing homework.
John: Where is your mother?
Billy: She is shopping. Today is Saturday, she always goes shopping on a Saturday.
John. Oh. Where is your father.
Billy: he's working. He's always working.
John: What about your sister?
Billy: She's playing out in the garden.
John: Well, I'm going to the park now. Are you coming.
Billy: Yes. All right. I'll do my homework later.

Preparation

Prepare materials.
Place “door” picture on the board in a position where it can be bottom left in your 4x4 apartment block.
Write the dialogue on the board (or give page reference if using a dialogue from a book.)

Procedure

1

Choose two stronger students to read the dialogue.
Go through the dialogue with the class identifying the uses of the present perfect. (5 Minutes)
Write a grammar table at the side of the board.

I am going We are going
You are going You are going
He is going They are going
She is going
It is going
(2 Minutes)

2

Tell students to close all books and put away all pens and pencils. They must not write anything.

Put room 1 to the right of the door..
Toss the ball to a student and ask what is happening in that room.
Choose a new student if first student can't answer.
Repeat on bottom row with rooms 2 and 3, then on other rows with 4,5,6,7 and 8,9,10,11 and 12,13,14,15

(10 Minutes)

3

Briefly (no more than two examples of each) practice question forms.

What is happening in room...”
Where is someone...”

(2 Minutes)

4

Put students into groups of 4-6.
Take down all the pictures except the door.

Ask groups questions in turn using the forms practiced. If group answers correctly put the corresponding picture on the board. If not ask next group the same question.
Repeat until all pictures are back on the board.

(16 Minutes)


5

Use double ball toss between groups. A student in one group must ask a student in the other group a question as practiced. The student in the other group musty answer and then ask a different question to the first student.

(10 Minutes)

6

Strong classes may complete this lesson very quickly.
A good extension activity is to choose a student to come to the board. The student draws a picture of someone doing something and the class must guess what it is.
The person who guesses becomes the next artist.
Remove all pictures first.


Notes

1. I Use the following pictures


  1. I use the following set of pictures. 


Friday 24 May 2013

Lesson Plan: Describing Faces

Lesson Level: Junior 1 and 2 (Grades 7 and 8) Duration: 45 Minutes

Lesson Title: Faces

Grammar and Vocabulary

Descriptive words for facial features

Lesson Objectives

To practice describing faces

Materials Required

The lesson requires a lot of materials1 but all are easy to prepare from white and coloured card.

You need three faces (round shape, oval shape rounded-corner square shape), assorted hair styles (long short, curly, straight spikey) in various colours (blond, black, brown, red) , assorted eyes, noses, mouths and ears. All need to be in proportion and the faces need to be approximately A4 size.
Blutac or other method of fixing to board.
Cards describing faces
e.g Oval face, big eyes, turned up nose, long ears, small mouth, short straight black hair.

Preparation

Prepare materials. Sort face parts into separate bags)
(See Pictures in Notes)

Procedure

1

Elicit from class2 words that can be used to describe
face shapes (round, square, oval etc)
eyes (big, small, wide, narrow, round, blue, green, brown, bloodshot, glasses etc)
ears (big, small, long, sticking-out, earrings etc)
mouths (big, small, wide, narrow, round etc)
noses (big, small, wide, narrow, long, turned-up etc)
hair (long, short,curly, staright, spiky, blonde, red, black, brown etc)

Make lists on board.
Leave a large space in the centre of the board.
(15 Minutes)

2

Construct a large face in the centre of the board by asking one student for a face shape and then drawing it, another for type of hair etc. Make it as funny looking as you can.
(4 Minutes)

3

Ask class to repeat the words (wide eyes etc)
(4 Minutes)

4

Clear desks at the front row.
Put noses on one desk, ears on another etc
Stick the three face shapes to the board.
(2 Minutes)

5

Ask for three volunteers (for this lesson there will usually be plenty)
Choose three students and give each a card describing a face and blutac to stick it together.
They must race to construct their faces.
(5 Minutes)

6.
Give first to finish 3 points, second 2 points, third 1 point.
For each face go through the card. Ask questions
What kind of hair is this?” etc
or, for weaker classes, tell class what it says on the card and ask if it is right.
For each correct feature on each face give 1 point.
Add up points and applaud the winner.
(5minutes)

7.
Repeat the activity for three more students.
(10 Minutes)
(There may be time for a third round)


Notes

  1. The art for the faces should be basic and cartoon-style. Samples of the art I used are attached below.

  1. For weaker classes put up more examples and elicit fewer words. For very weak classes put up all the words (one at a time) and simplky check meanings.


Tuesday 21 May 2013

Lesson Plan: Ice-Cream Sundae

Lesson Level: Senior 1 (Grade 11) Duration: 45 Minutes

Lesson Title: Ice-Cream Sundae (Lesson by Carole Daley)

Grammar and Vocabulary

Instructions.
Following instructions.
Vocabulary of ingredients and cooking

Lesson Objectives

Students to understand and practice following instructions and giving instructions in a sequence, then to put together a recipe; putting the method in the correct order.

Materials Required

Ice-cream sundae image (optional, can draw or obtain from internet)
Envelopes with method sentences1 inside each one. Enough for 12 groups.

Recipe: ingredients, method (step by step instructions)


Preparation

Prepare materials.
Write “Move, Left, Right, Forward. Backward, Turn, Sit, Pick up pen, Write on board” on the board

Procedure

1

Warm up: Sequence Game
Check comprehension of words on board.
Get a student to stand at the front of the class. Other students have to give direct instruction to:
  1. Get them back to their seat
  2. Pick up a pen
  3. Write their name on the board
    (5 Minutes)

2

Introduce topic – Foods for a Recipe. Q & A about different recipe ingredients :

Beef Noodle: Noodles, beef
Cake: eggs, flour, milk, sugar
Roast dinner: potatoes, chicken, carrots, broccoli
(5 Minutes)

3

Write recipe example on board and explain how to make a pizza getting students to help with the sequencing and ingredients

Ingredients: Pizza base, tomato sauce, cheese, pepperoni

Method:
  1. Put tomato sauce on pizza base
  2. Sprinkle with cheese
  3. Add pepperoni
  4. Place in oven for 15 minutes
  5. Slice and serve
(10 Minutes)

4

Put ice-cream sundae image on board.
Explain ice-cream sundae.

5

Build a recipe for an ice-cream sundae

Put class in groups.
Give each group a set of method sentences in an envelope.

First students need to work out what ingredients are needed by picking out the ingredients from the sentences which make up the method?

Students to rearrange the sequence to form the method for creating an ice-cream sundae
(10 Minutes)

6

Students from one group to stand up and describe list of ingredients and the sequence of instructions.

Repeat with another group.
(5 Minutes)

7

Alphabet game.
Whole class to play alphabet game – saying I went to the shop to buy…..Then each student in turn as to say a food item beginning with a letter from the alphabet. Keeping to alphabetical order. Each student has to say the whole shopping list from a – which ever letter they are on. It is a memory game plus it helps them with food items and the letters of the alphabet.
(10 Minutes)

Notes

1. Method sentences
    Place one scoop of Chocolate ice-cream in a sundae glass
    Add some chocolate fudge cake
    Poor on some chocolate sauce
    Add a scoop of vanilla ice-cream
    Add some more chocolate sauce and fudge cake
    Add another scoop of chocolate ice-cream
    Add some more chocolate sauce
    Sprinkle with chocolate

Sunday 19 May 2013

Lesson Plan: Shopping and Clothes

Lesson Level: Junior 1 and 2 (grade 7 and 8) Duration: 45 Minutes

Lesson Title: Shopping and Clothes

Grammar and Vocabulary

Clothes vocabulary.
Shopping interactions.

Lesson Objectives

To develop a wider vocabulary of clothing items.
To develop language for interactions in shops.
To develop language for politely complaining.

Materials Required

None

Preparation

None

Procedure

1

Divide the class into groups of about eight. There should be no more than ten groups. If necessary use larger groups.)

2

Draw a human figure outline in the centre of the board. Draw a belt on the figure.
Divide the rest of the board into the same number of columns as you have groups.
(2 Minutes)

3

Tell the class that even numbered groups should make a list of things worn above the belt and odd numbered groups should make a list of things worn below the belt. (Check understanding and give two examples of each if necessary.)
Give groups two minutes.
(5 Minutes)

4

One writer from each group comes to board and writes the list. Give up to two minutes.
(3 Minutes)

5

Check lists.
If item is NOT clothing or is worn in the wrong place (e.g if an odd numbered group says “hat”) the zero points.
If it is correct and spelled correctly give two points.
If it is correct but not spelled correctly give 1 point and correct the spelling.
(5 Minutes)

6

Clear the board.
Draw two faces at opposite ends of the board facing each other.
Under one write “shopkeeper”, under the other write “customer”
Draw a speech balloon at the top of the board for the shopkeeper and write “Good morning. How can I help you?”
Draw a speech balloon for the customer and write “I bought _______ here but there is a problem.”
Elicit further exchanges to complete the dialogue. (There should be four to six exchanges.
(5 Minutes)

7

Choose two students to come to the front and act out the role play from the board.
Repeat with two more students.
(5 Minutes)

8

Put the class into pairs and tell each p[air that one student is a shopkeeper and the other a customer.
Clear the board.
Elicit other possible problems (torn, dirty, don't fit, don't like, wrong colour etc)
Students role play a customer complaining and a shopkeeper.
Reverse roles and repeat.
(10 Minutes)

9

Choose one pair to come to front and act out their dialogue.
Repeat with other pairs to end of lesson.
(10 Minutes)


Notes

None

Lesson Plan: Music

Lesson Level:All Levels Duration: 45 Minutes

Lesson Title: Music

Grammar and Vocabulary

Vocabulary for describing music
Expressing opinions

Lesson Objectives

To encourage discussion skills.
To develop descriptive vocabulary.

Materials Required

Sponge ball.
Prepared tape or other audio source1:-.
One longer piece of music, preferably instrumental (Approx 2 minutes) should be followed by eight to ten other shorter pieces (approx 30 seconds each). The pieces should be in various genres (classical/pop/rock/jazz etc) and at a variety of paces. Instrumental and vocal pieces should be included.


Preparation

The classroom needs to have the facility to play the music chosen.

Procedure

1

Tell the students that while the music is playing they must throw the ball quickly to another student. The student who has the ball when the music stops must run to the board and write the name of a musical instrument.

When the student sits down check that the spelling is correct and start the music again.

Play until the longer music piece has finished. (Note – you can rewind and continue if you wish.)

Check comprehension of all the musical instruments on the board.(5 Minutes)

2

Put class into groups of 6-8 students.

3

Elicit and write on the board the kind of words you can use to describe music

fast/medium paced/slow
loud/quiet
vocal/instrumental etc2  

(5 Minutes)

 4

Play the shorter pieces one at a time
After each piece finishes all students write down three words to describe the music
Groups discuss the words they have written and decide as a group on three words.
Words can be from the board or any others they think of.
Question some of the groups about the piece
Elicit the words they have used to describe it.
Ask other groups if they agree.  

Get groups to discuss the music and decide on a mark from 1-5
1=very bad 2=poor 3=OK 4=good 5=Great
Get scores and put on board, include name of genre.
Write the piece number, the total score from the class (and for stronger classes the name of the musical genre.)

(5 To 6 Minutes per piece)

5

At the end find the piece with the highest score and play it again.

6 Extension Activity

Extension activity.
If the lesson runs short toss the ball from student to student asking them what is their favourite music and why they like it.


Notes

  1. I find that the simplest way to present the music is on tape with the exact extracts to be used recorded in order with ten second gaps. This prevents any need to find the pieces during the lesson so that there is no wasted time. Other methods – MP3, computer files are also possible depending on facilities available.

  1. I have seen other teachers do this lesson and some like to separate the words into good/bad/neutral lists. I find that this is more confusing than helpful. Putting words into groups (e.g. fast, medium-paced, slow) can be helpful.

  1. As the vocabulary and descriptions are coming from the students themselves, this lesson is suitable for all levels. The teacher can guide the students into simpler or more complex use of language according to the class.